How To Screenshot On Windows: Whether you’re working, studying, or just browsing, knowing how to take a screenshot on Windows is a must-have skill. Screenshots help you capture exactly what’s on your screen—be it an error message, a funny meme, or an important document.
In this guide, we’ll show you how to screenshot on Windows using different built-in tools and shortcuts. No extra software required!
Why You Might Need a Screenshot?
- To save error messages for tech support
- To share part of your screen in emails or presentations
- To capture online receipts or records
- For tutorials, blogs, or school assignments
How to screenshot on Windows full screen?
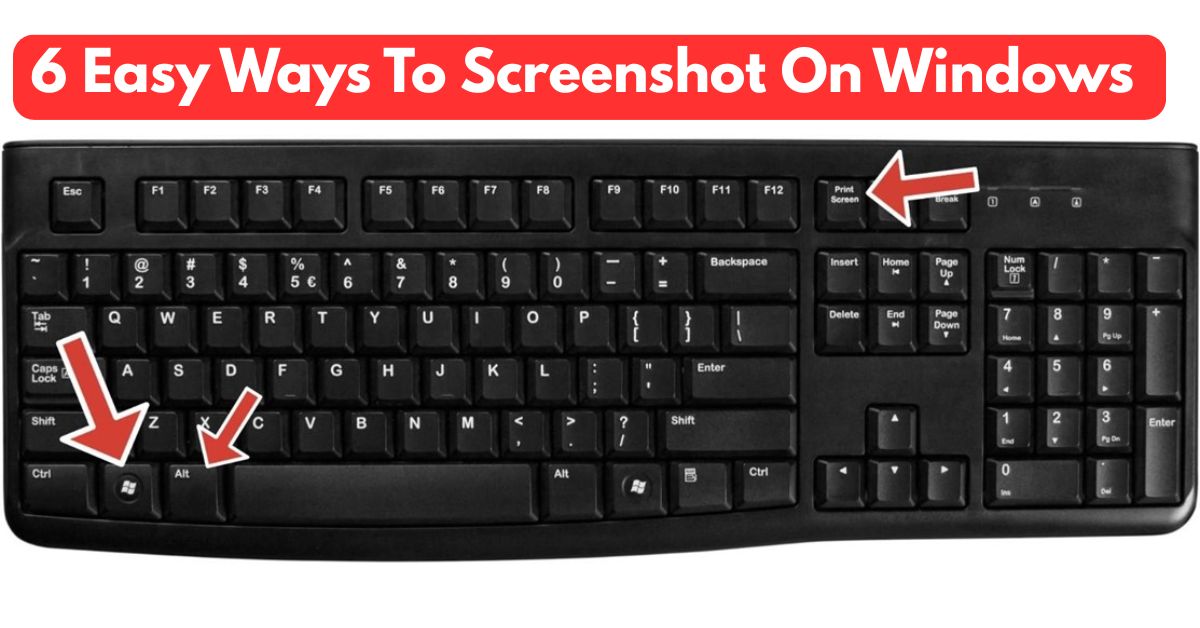
Method 1: Using the Print Screen (PrtScn) Key
Best for: Quick full-screen capture
Steps:
- Press PrtScn on your keyboard (usually in the top row).
- Open Paint, Word, or any image editor.
- Paste the screenshot (Ctrl + V).
- Save it as an image file.
Method 2: Alt + PrtScn for Active Window Only
Best for: Capturing just one open window (e.g., browser or app)
Steps:
- Click on the window you want to capture.
- Press Alt + PrtScn.
- Paste it into any image or document editor (Ctrl + V).
- Save the file.
Method 3: Windows Key + Shift + S (Snip & Sketch / Snipping Tool) on Windows 10 / 11
Best for: Selecting a specific area of the screen
Steps:
- Press Windows + Shift + S.
- Your screen will dim and your cursor will change into a cross.
- Select the area you want to capture.
- The screenshot is automatically copied to your clipboard.
- Open Snipping Tool, Paint, or any app to paste (Ctrl + V) and save.
Method 4: Windows Key + PrtScn
Best for: Auto-saving screenshots
Steps:
- Press Windows + PrtScn.
- The screen will flash briefly—screenshot taken!
- Find the saved image in this path:
- Pictures > Screenshots
Method 5: Using the Snipping Tool App
Best for: Editing screenshots right away
Steps:
- Open the Snipping Tool (search in Start Menu).
- Click New and select your screenshot area.
- Edit or highlight inside the app.
- Save your screenshot.
Works on: Windows 7, 10, 11
Method 6: Using Xbox Game Bar (Windows 10/11)
Best for: Gamers and screen recording
Steps:
- Press Windows + G to open Game Bar.
- Click the Camera icon or press Windows + Alt + PrtScn.
- Screenshots are saved in:
- Videos > Captures
Pro Tip: Use Third-Party Tools (Optional)
If you want advanced features like:
- Auto-uploading to the cloud
- Annotation tools
- Scheduled screenshots
- You can try tools like Lightshot, ShareX, or Greenshot.
Conclusion
Taking screenshots on Windows is simple and versatile. Whether you want to capture your entire screen, a portion, or just one window, Windows offers multiple ways to get the job done. From quick shortcuts like PrtScn to powerful tools like the Snipping Tool or Xbox Game Bar—there’s a method for everyone.
Paul Rudd Burn: Real Or Fake? Here’s the Truth Behind the Viral Buzz